Skip to content

Cheat sheet

--:--:--local time

Cheat sheet

Blueprint tracker

All 91 blueprints in ARC Raiders by category, with where each one drops. Mark the ones you own to tick them off like a checklist, and track the one you’re after; for those tied to a map condition, it shows when that’s on next.

Fill from your game

Workshop levels, projects, blueprints and stash counts

Link on My Raider

Blueprints

91 in the gameTrack one and it shows up next to your shopping list
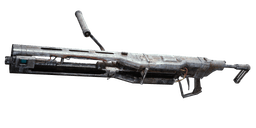
  • Anvil

    Weapon

    All maps: Raider Caches, backpacks, ammo and weapon cases

    To research

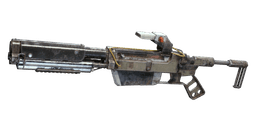
  • Aphelion

    Weapon

    Stella Montis only: any container, any condition

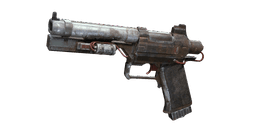
  • Bantam

    Weapon

    Likely Pendola Pass only: any container

    To research

  • Bettina

    Weapon

    All maps: Raider Caches, backpacks, ammo and weapon cases

    To research

  • Bobcat

    Weapon

    During Locked Gate or Hurricane: any container, and First Wave Caches

    Trophy Display, phase 4

  • Burletta

    Weapon

    Quest reward: Industrial Espionage (Tian Wen)

    To research

  • Canto

    Weapon

    During Hurricane: First Wave Caches

    To research

  • Dolabra

    Weapon

    During Close Scrutiny: ARC Assessor containers

  • Equalizer

    Weapon

    During Harvester: the Harvester's loot, once its puzzle is solved

  • Hullcracker

    Weapon

    Quest reward: The Major's Footlocker (Tian Wen)

    To research

  • Il Toro

    Weapon

    All maps: Raider Caches, backpacks, ammo and weapon cases

    To research

  • Jupiter

    Weapon

    During Harvester: the Harvester's loot, once its puzzle is solved

  • Osprey

    Weapon

    All maps: Raider Caches, backpacks, ammo and weapon cases

    To research

  • Rascal

    Weapon

    All maps: Raider Caches, backpacks, ammo and weapon cases

    To research

  • Stiletto

    Weapon

    Likely Pendola Pass only: any container

    To research

    • Research StationLevel 1
    • Research Points3,000
    • Wasp Driver×15
  • Tempest

    Weapon

    During Night Raid or Hurricane: Residential containers, and First Wave Caches

  • Torrente

    Weapon

    All maps: Raider Caches, backpacks, ammo and weapon cases

    To research

  • Venator

    Weapon

    All maps: Raider Caches, backpacks, ammo and weapon cases

    To research

  • Vulcano

    Weapon

    During Hidden Bunker or Hurricane: any container, and First Wave Caches

  • Angled Grip II

    Attachment

    All maps: Residential containers: drawers, cabinets, closets, desks, trash cans

    To research

  • Angled Grip III

    Attachment

    During Electromagnetic Storm, Locked Gate or Night Raid: Residential containers on any map

  • Compensator II

    Attachment

    All maps: Residential containers: drawers, cabinets, closets, desks, trash cans

    To research

  • Compensator III

    Attachment

    During Electromagnetic Storm, Locked Gate or Night Raid: Residential containers on any map

  • Extended Barrel II

    Attachment

    All maps: any container, any condition

    To research

  • Extended Barrel III

    Attachment

    During Electromagnetic Storm, Locked Gate or Night Raid: Residential containers on any map

  • Extended Light Mag II

    Attachment

    All maps: Residential containers: drawers, cabinets, closets, desks, trash cans

    To research

  • Extended Light Mag III

    Attachment

    During Electromagnetic Storm, Locked Gate or Night Raid: Residential containers on any map

  • Extended Medium Mag II

    Attachment

    All maps: Residential containers: drawers, cabinets, closets, desks, trash cans

    To research

  • Extended Medium Mag III

    Attachment

    During Electromagnetic Storm, Locked Gate or Night Raid: Residential containers on any map

  • Extended Shotgun Mag II

    Attachment

    All maps: Residential containers: drawers, cabinets, closets, desks, trash cans

    To research

  • Extended Shotgun Mag III

    Attachment

    During Electromagnetic Storm, Locked Gate or Night Raid: Residential containers on any map

  • Lightweight Stock

    Attachment

    During Electromagnetic Storm, Locked Gate or Night Raid: Residential containers on any map

  • Muzzle Brake II

    Attachment

    All maps: Residential containers: drawers, cabinets, closets, desks, trash cans

    To research

  • Muzzle Brake III

    Attachment

    During Electromagnetic Storm, Locked Gate or Night Raid: Residential containers on any map

  • Padded Stock

    Attachment

    During Electromagnetic Storm, Locked Gate, Night Raid or Hidden Bunker: Residential containers on any map

  • Shotgun Choke II

    Attachment

    All maps: Residential containers: drawers, cabinets, closets, desks, trash cans

    To research

  • Shotgun Choke III

    Attachment

    During Electromagnetic Storm, Locked Gate or Night Raid: Residential containers on any map

  • Shotgun Silencer

    Attachment

    During Electromagnetic Storm, Locked Gate, Night Raid or Hidden Bunker: Residential containers on any map

    Trophy Display, phase 3

  • Silencer I

    Attachment

    All maps: Residential containers: drawers, cabinets, closets, desks, trash cans

    To research

  • Silencer II

    Attachment

    All maps: Residential containers: drawers, cabinets, closets, desks, trash cans

    To research

  • Stable Stock II

    Attachment

    All maps: Residential containers: drawers, cabinets, closets, desks, trash cans

    To research

  • Stable Stock III

    Attachment

    During Electromagnetic Storm, Locked Gate or Night Raid: Residential containers on any map

  • Vertical Grip II

    Attachment

    All maps: Residential containers: drawers, cabinets, closets, desks, trash cans

    To research

  • Vertical Grip III

    Attachment

    During Electromagnetic Storm, Locked Gate or Night Raid: Residential containers on any map

    To research

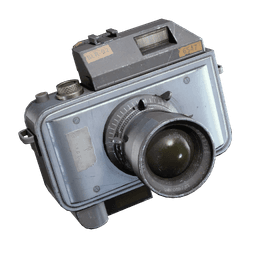
  • Advanced Camera

    Utility

    Likely only from Sheltered Retreat, not containers

    Sheltered Retreat, phase 1

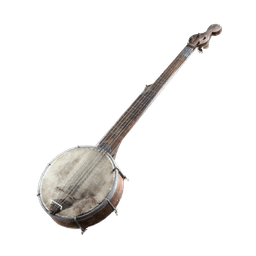
  • Banjo

    Utility

    Likely Pendola Pass only: any container

  • Barricade Kit

    Utility

    All maps: Electrical containers: server racks, terminals, breaker boxes, androids

    To research

  • Blaze Grenade

    Utility

    All maps: Industrial containers: red and green lockers, tool cabinets, metal crates, car trunks

  • Blue Light Stick

    Utility

    All maps: any container, any condition

  • Crash Mat

    Utility

    Riven Tides only: any container, any condition

    Ascending The Mountain, phase 2

    To research

  • Deadline

    Utility

    Stella Montis only: any container, any condition

    To research

  • Emperor Gateway Conduit

    Utility

    Pendola Pass only: the Harvester payload, during Redirection

  • Explosive Mine

    Utility

    All maps: Industrial containers: red and green lockers, tool cabinets, metal crates, car trunks

    To research

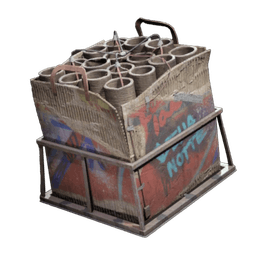
  • Fireworks Box

    Utility

    During Cold Snap: any container

  • Gas Mine

    Utility

    Stella Montis only: any container, any condition

    To research

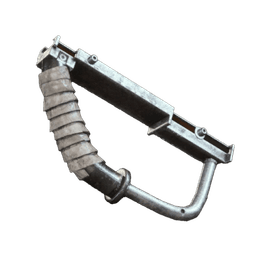
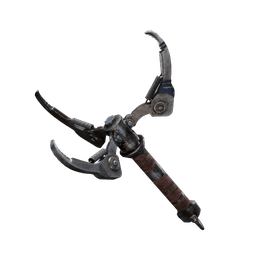
  • Grappling Hook

    Utility

    Likely Pendola Pass only: any container

    Reward Pass level 12 (free)

    To research

    • Research StationLevel 1
    • Research Points2,000
    • Rope×10
  • Green Light Stick

    Utility

    All maps: any container, any condition

  • Jolt Mine

    Utility

    All maps: Industrial containers: red and green lockers, tool cabinets, metal crates, car trunks

    To research

  • Lure Grenade

    Utility

    Quest reward: Greasing Her Palms (Celeste)

    To research

  • Powered Descender

    Utility

    Riven Tides only: any container

    To research

  • Pulse Mine

    Utility

    Stella Montis only: any container, any condition

    To research

  • Red Light Stick

    Utility

    All maps: any container, any condition

    Sheltered Retreat, phase 2

  • Remote Raider Flare

    Utility

    All maps: Electrical containers: server racks, terminals, breaker boxes, androids

    To research

    • Research StationLevel 1
    • Research Points500
    • Chemicals×25
  • Seeker Grenade

    Utility

    Stella Montis only: any container, any condition

    To research

  • Showstopper

    Utility

    All maps: Industrial containers: red and green lockers, tool cabinets, metal crates, car trunks

    To research

  • Smoke Grenade

    Utility

    All maps: Residential containers: drawers, cabinets, closets, desks, trash cans

    To research

  • Snap Hook

    Utility

    During Electromagnetic Storm: any container inside the storm

    Trophy Display, phase 5

  • Surge Coil

    Utility

    During Electromagnetic Storm: any container, on any map

    To research

  • Tagging Grenade

    Utility

    All maps: Electrical containers: server racks, terminals, breaker boxes, androids

    To research

  • Tether Launcher

    Utility

    Likely Pendola Pass only: any container

    To research

  • Trailblazer

    Utility

    Stella Montis only: any container, any condition

    To research

  • Trigger Nade

    Utility

    All maps: any container, any condition

    To research

  • White Flag

    Utility

    Riven Tides only: any container, any condition

    To research

    • Research StationLevel 1
    • Research Points500
    • Planks×5
  • Wolfpack

    Utility

    During Night Raid: Residential containers on any map

  • Yank Grenade

    Utility

    Likely Pendola Pass only: any container

    To research

    • Research StationLevel 1
    • Research Points1,000
    • Steel Cable×8
  • Yellow Light Stick

    Utility

    All maps: any container, any condition

  • Defibrillator

    Medical

    All maps: Medical containers: medical drawers and medical bags

    To research

  • Vita Shot

    Medical

    All maps: Medical containers: medical drawers and medical bags

    Trophy Display, phase 2

    To research

  • Vita Spray

    Medical

    All maps: Medical containers: medical drawers and medical bags

    To research

  • Combat Mk. 3 (Aggressive)

    Augment

    Stella Montis and Blue Gate: Security containers (black crates, box lockers) and Medical containers

  • Combat Mk. 3 (Flanking)

    Augment

    Stella Montis and Blue Gate: Security containers (black crates, box lockers) and Medical containers

    To research

  • Looting Mk. 3 (Survivor)

    Augment

    All maps: Security and Medical containers, and metal crates

  • Tactical Mk. 3 (Defensive)

    Augment

    Stella Montis and Blue Gate: Security containers (black crates, box lockers) and Medical containers

    To research

  • Tactical Mk. 3 (Healing)

    Augment

    Stella Montis and Blue Gate: Security containers (black crates, box lockers) and Medical containers

  • Tactical Mk. 3 (Revival)

    Augment

    Stella Montis and Blue Gate: Security containers (black crates, box lockers) and Medical containers

    To research

  • Tactical Mk. 3 (Smoke)

    Augment

    All maps: Security and Medical containers, and metal crates

  • Looting Mk. 3 (Safekeeper)

    Augment

    All maps: Security and Medical containers, and metal crates

    To research

  • Complex Gun Parts

    Crafting

    All maps: Security containers: black crates and box lockers

    To research

  • Heavy Gun Parts

    Crafting

    All maps: Raider Caches, backpacks, ammo and weapon cases

    To research

  • Light Gun Parts

    Crafting

    All maps: Raider Caches, backpacks, ammo and weapon cases

    Trophy Display, phase 1

    To research

  • Medium Gun Parts

    Crafting

    All maps: Raider Caches, backpacks, ammo and weapon cases

    To research

Advertisement

Remove ads

▶Cheat Sheet GuideNeeded items, blueprints, designs, stencils and your list

ARC Raiders Cheat Sheet — How It Works

Needed Items

The Needed tab lists every item your Workshop upgrades, quests from Shani, Celeste, Tian Wen, Apollo and Lance, and projects ask for, grouped by goal. Count what you have with the steppers, track the goals you're working on, and the shopping list adds up everything they still need, from ARC Alloy, Electrical Components and Durable Cloth to specialty drops like Wasp Drivers and Bastion Cells.

Blueprint Locations

Every blueprint in ARC Raiders is listed with where it drops, and for those tied to a map condition, when it's next live. Mark the ones you own, track the ones you're after, and cross-reference the interactive map to see which containers on Dam, Spaceport, Buried City, Blue Gate, Stella Montis, Riven Tides and Pendola Pass are worth searching.

Furniture Designs

The Designs tab lists all 100 furniture designs for your Outpost. 52 can be researched at a Research Station, 78 drop in raids, 4 come from the Reward Pass, 20 are project rewards and 6 come with the Outpost; a design can have more than one source. Mark the ones you've learned and track the ones you're after.

Weapon Stencils

The Stencils tab lists all 14 weapon stencils. Each one fits the weapons it names, and applying it costs 2 to 15 Stencil Parts. 8 drop in raids, 5 come from the Reward Pass and 1 from the store.

Your List

Your list gathers what your tracked goals still need, plus any item you add yourself, so you can count them during a raid. It works without an account and syncs to your account when you sign in, and Home shows the top of it.